
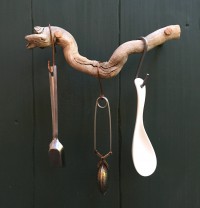

Though not technically a “branch,” this Alder root has a similar attitude.
A foraged branch handle is perfect for rustic doors or drawers, but it could also be a thing-organizer as pictured above.
1. FORAGE
Find a handsome branch that has fallen. It should be 1″ – 2″ in diameter.
Stop by a hardware store and get some 4″ long #9 screws, roughly 6″ of 3/8″ brass tubing and some 3/8″ oak hole plugs. A few other tools you’ll need include: a measuring tape, a tubing cutter, a drill and drill bits (1/8″ and 3/8″), a screwdriver and a saw. A good Japanese handsaw is a workbench staple and is perfect for this task. (Japanese saws cut on the pull stroke so are easier to control.)
2. FABRICATE
Cut out a section that has character and lay it on the workbench the way you’d like to see it mounted. Drill a 1/8″ pilot hole in each end, straight down all the way through the branch. This will prevent it from splitting when you drive in a screw, and will be a guide for the next steps.
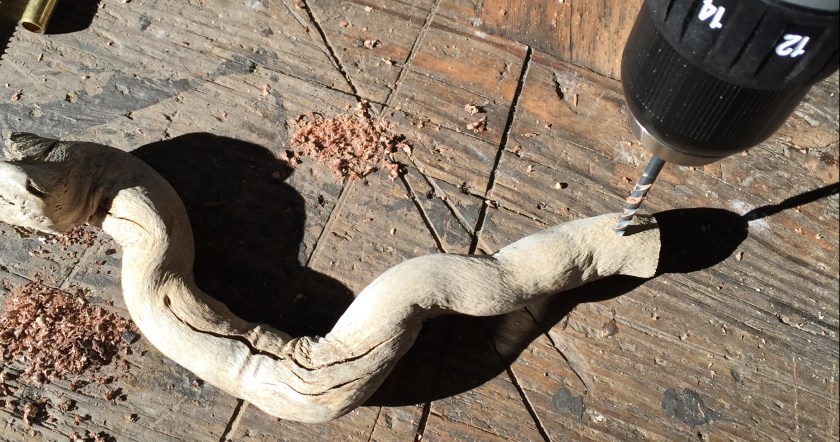
drilling pilot holes

a completed counterbore

aligning the tubing cutter
With the 3/8″ drill bit, make two counterbores (recesses for the screw heads and plugs) by placing the tip of the bit in the center of each hole and drilling carefully 1/4″ deep.
Flip the branch so the backside is up. Drill two more counterbores 1/4″ deep for the brass tubing.
Mark two 1-1/2″ sections on the tubing and place the tubing into the cutter. Line up the cutting wheel on your mark. Tighten the thumbscrew until the cutting wheel is snug. Rotate the cutter around the tubing one full revolution. Tighten the thumbscrew slightly; perform another revolution. Continue until the piece drops off.

exploded view of parts
3. AFFIX
Mark out your handle location. Please ensure symmetry. Loosely assemble all pieces; align on your mark and drive the screws in until snug. Finish with a little wood glue on each of the oak plugs and press into the counterbore to hide the screw head. Or use brass screws which look nice, and skip this step.
The handle will be quite strong when properly installed. make sure the tubing is snug to the face of the door, drawer or wall, and snug to the counterbores on the backside.

loosely assembled and ready to affix

completed handles in Sycamore, Manzanita driftwood, and Alder root

What beautiful handles! With those detailed directions and visuals, I think even I could make those!
Mele
LikeLike
Pingback: Off-Grid Bathroom | Cabin Dweller's Textbook