


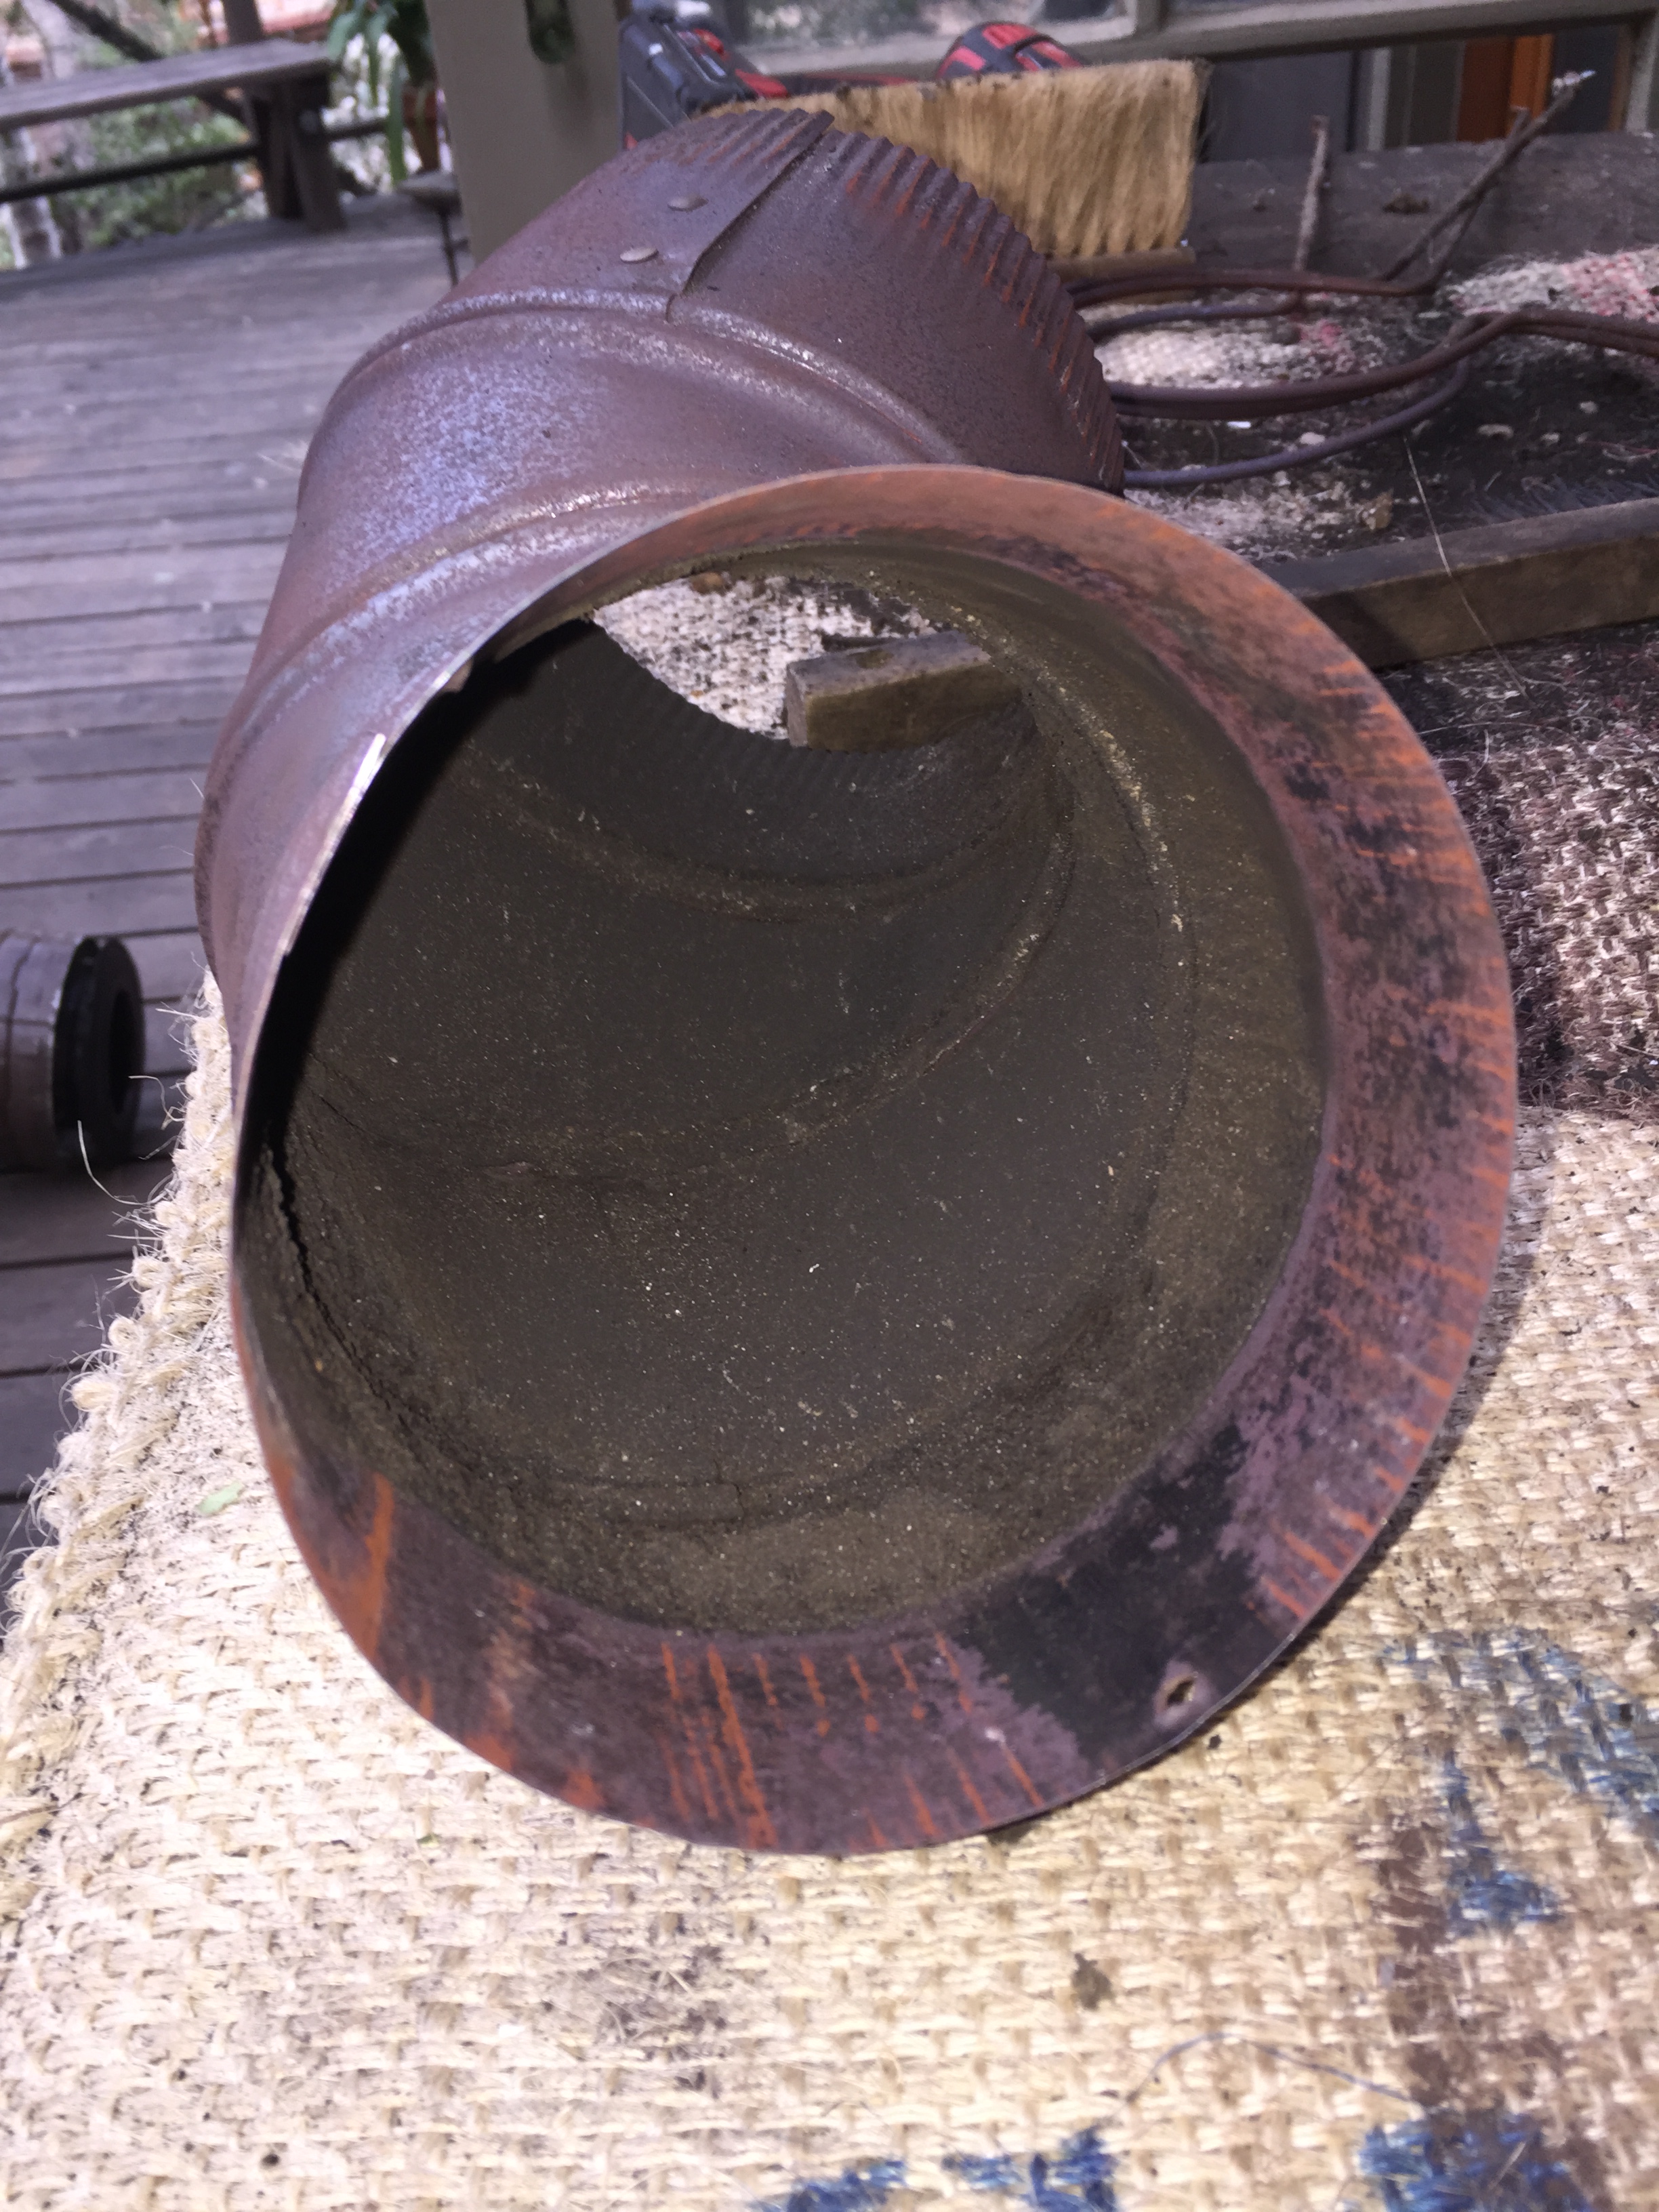
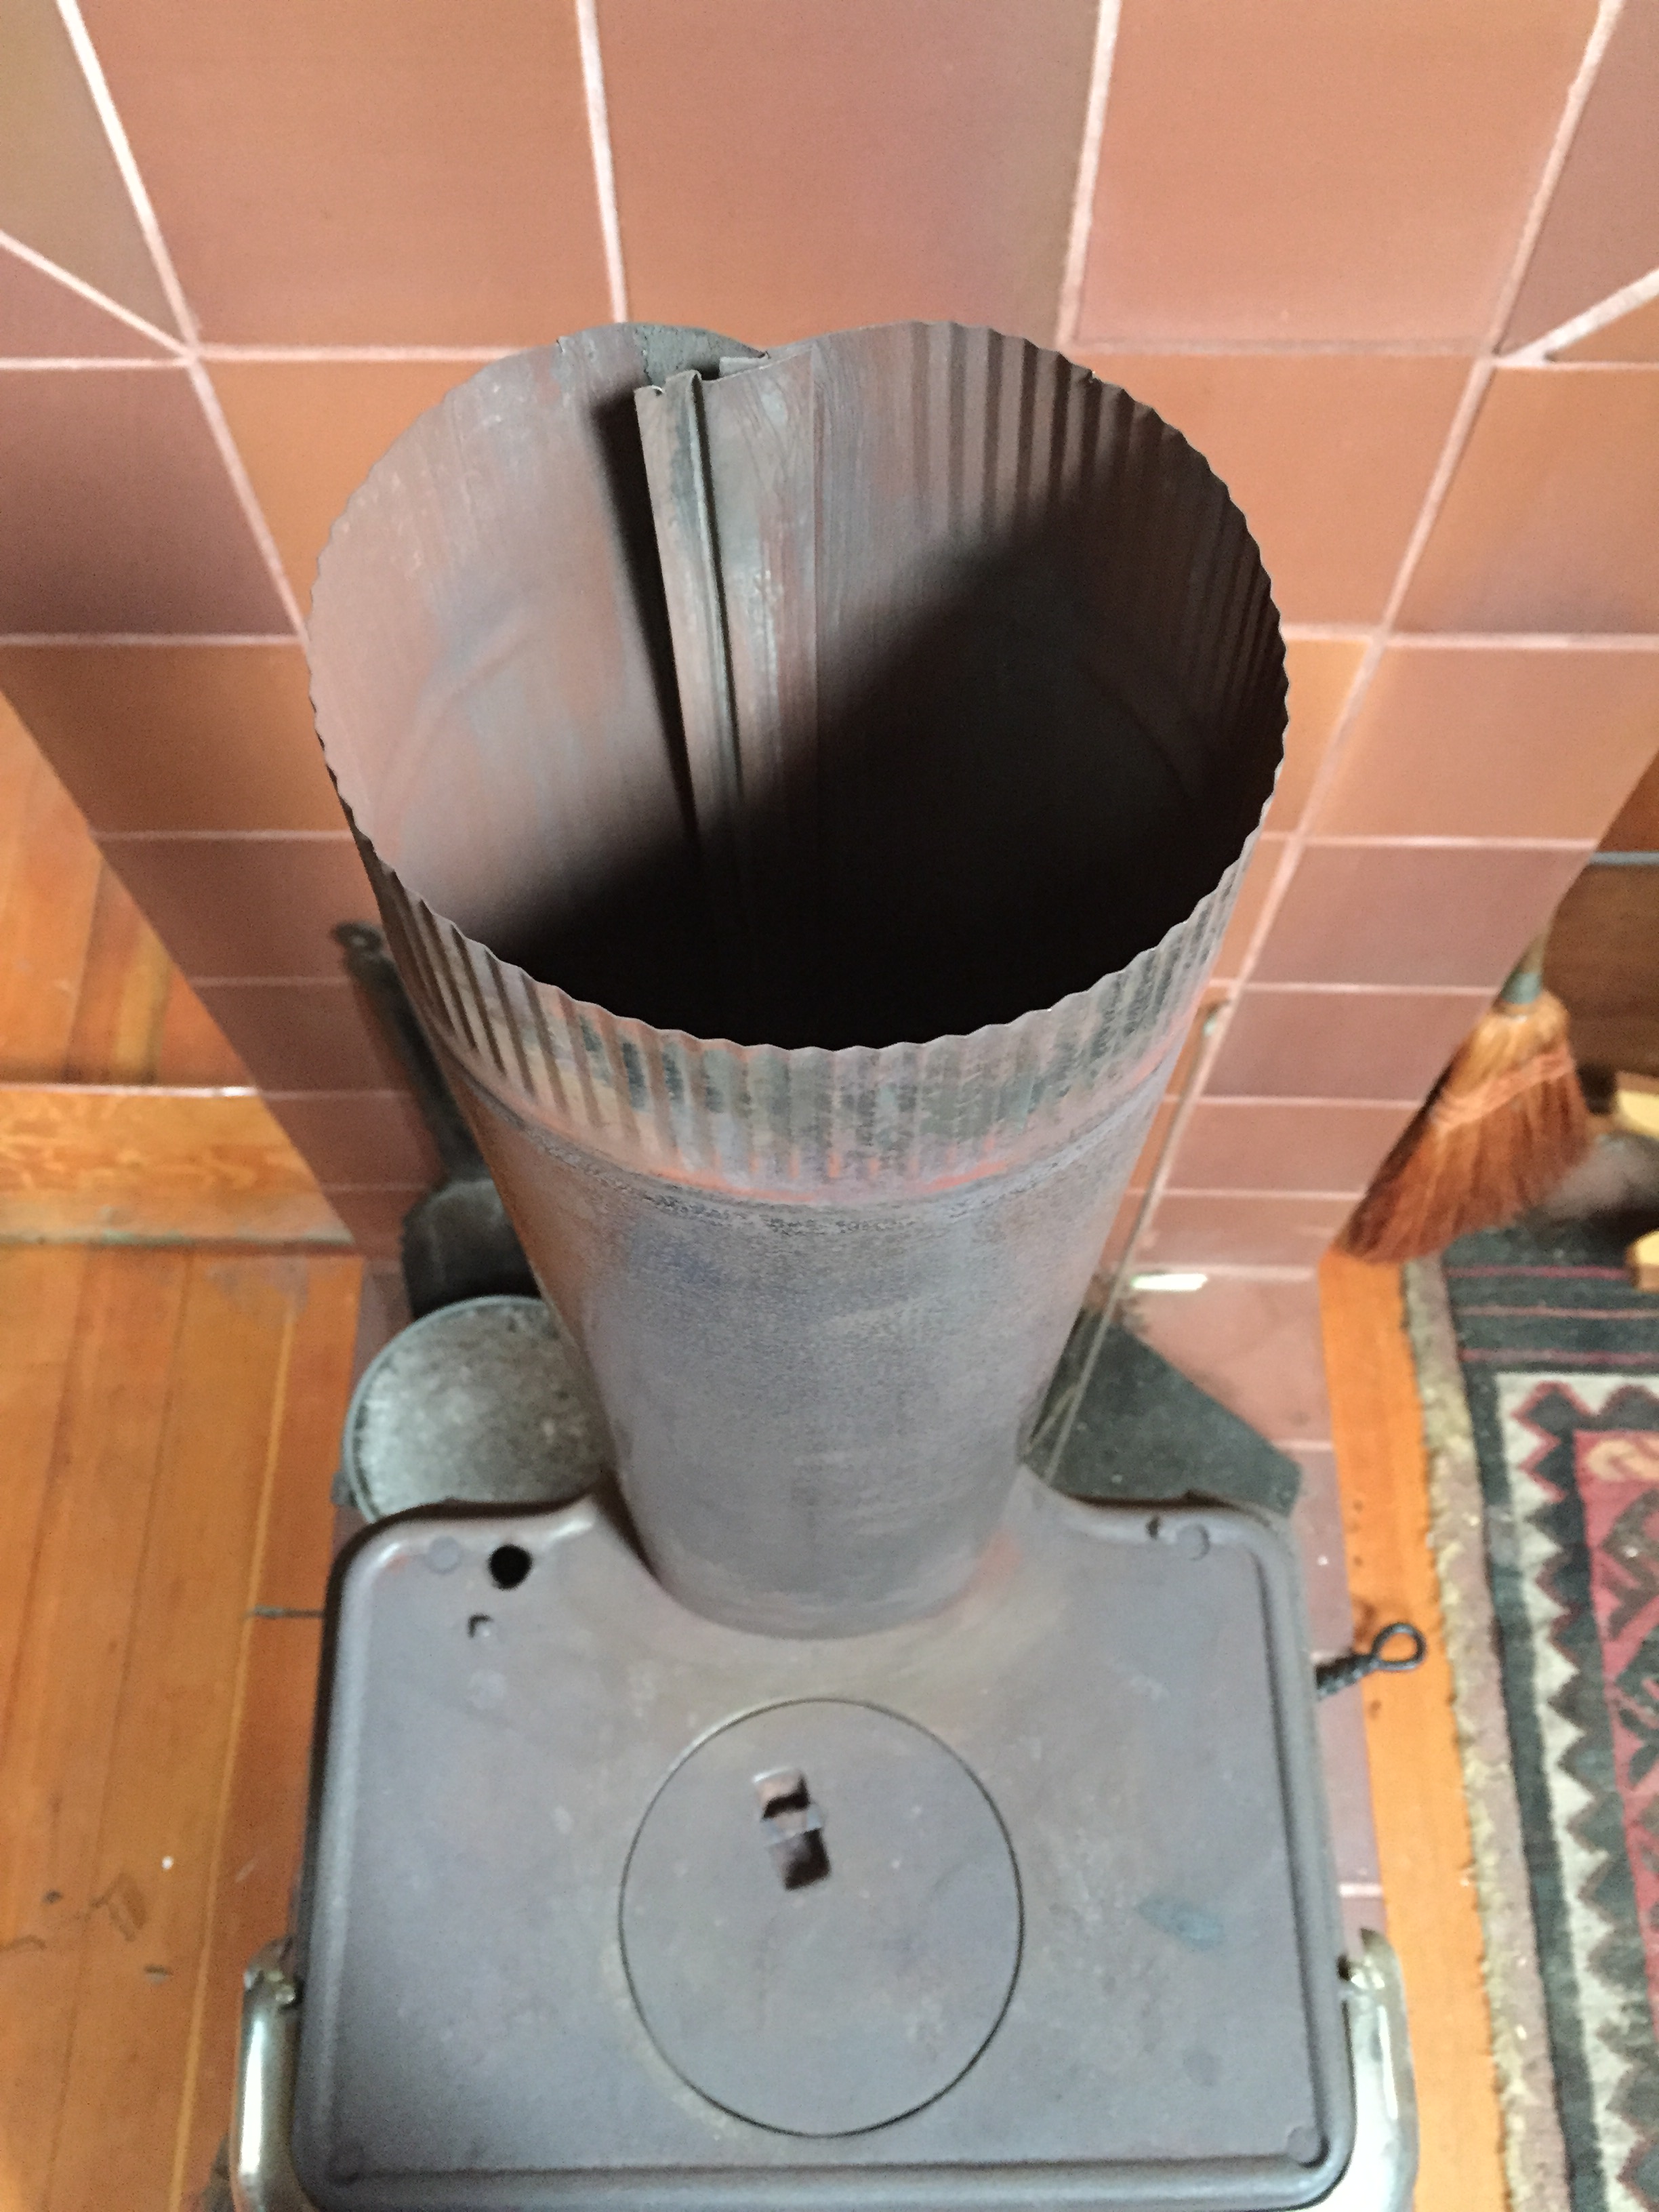
Light build-up of creosote inside a section of flue pipe.
THE EXHAUST FROM A FIRE–known to wonks as “flue gas”–is safely conveyed out of the cabin by the flue. On its way out, flue gas condenses on the inside walls of the flue as a sooty deposit called creosote. If it goes unchecked, it can become a highly flammable problem. Built-up creosote in a flue can get hot enough to combust, kicking off a virtually unstoppable conflagration that could bring the whole #cabinlife dream to a sad end. As with all the systems around the cabin, an intimate relationship with your chimney stack is rewarding and will alert you to safety issues before they cause trouble.
 Your maintenance interval will be once a year, or less frequently, depending on how often you burn, the quality of your fuel, and the efficiency of your fire. The flue section pictured above was swept 2 years prior and gets daily use about four months out of the year. Fully-seasoned wood burning in hot fires will reduce creosote formation. Wet wood, pressure treated lumber, paper or other trash produce more flue gas; low slow fires allow the gas a longer “residence time” in the flue.
Inspect the flue once a year for creosote build-up which can look flaky, chunky or sticky. If you don’t see smooth walls inside the flue, its time to sweep.
A chimney brush the same diameter as the inside of your flue pipe is a good investment, so start there. Measure the inside diameter of the flue (keep in mind that yours may be double walled) and procure a brush. You’ll also want a couple smaller wire brushes, gloves and a respirator–creosote dust is nasty stuff.
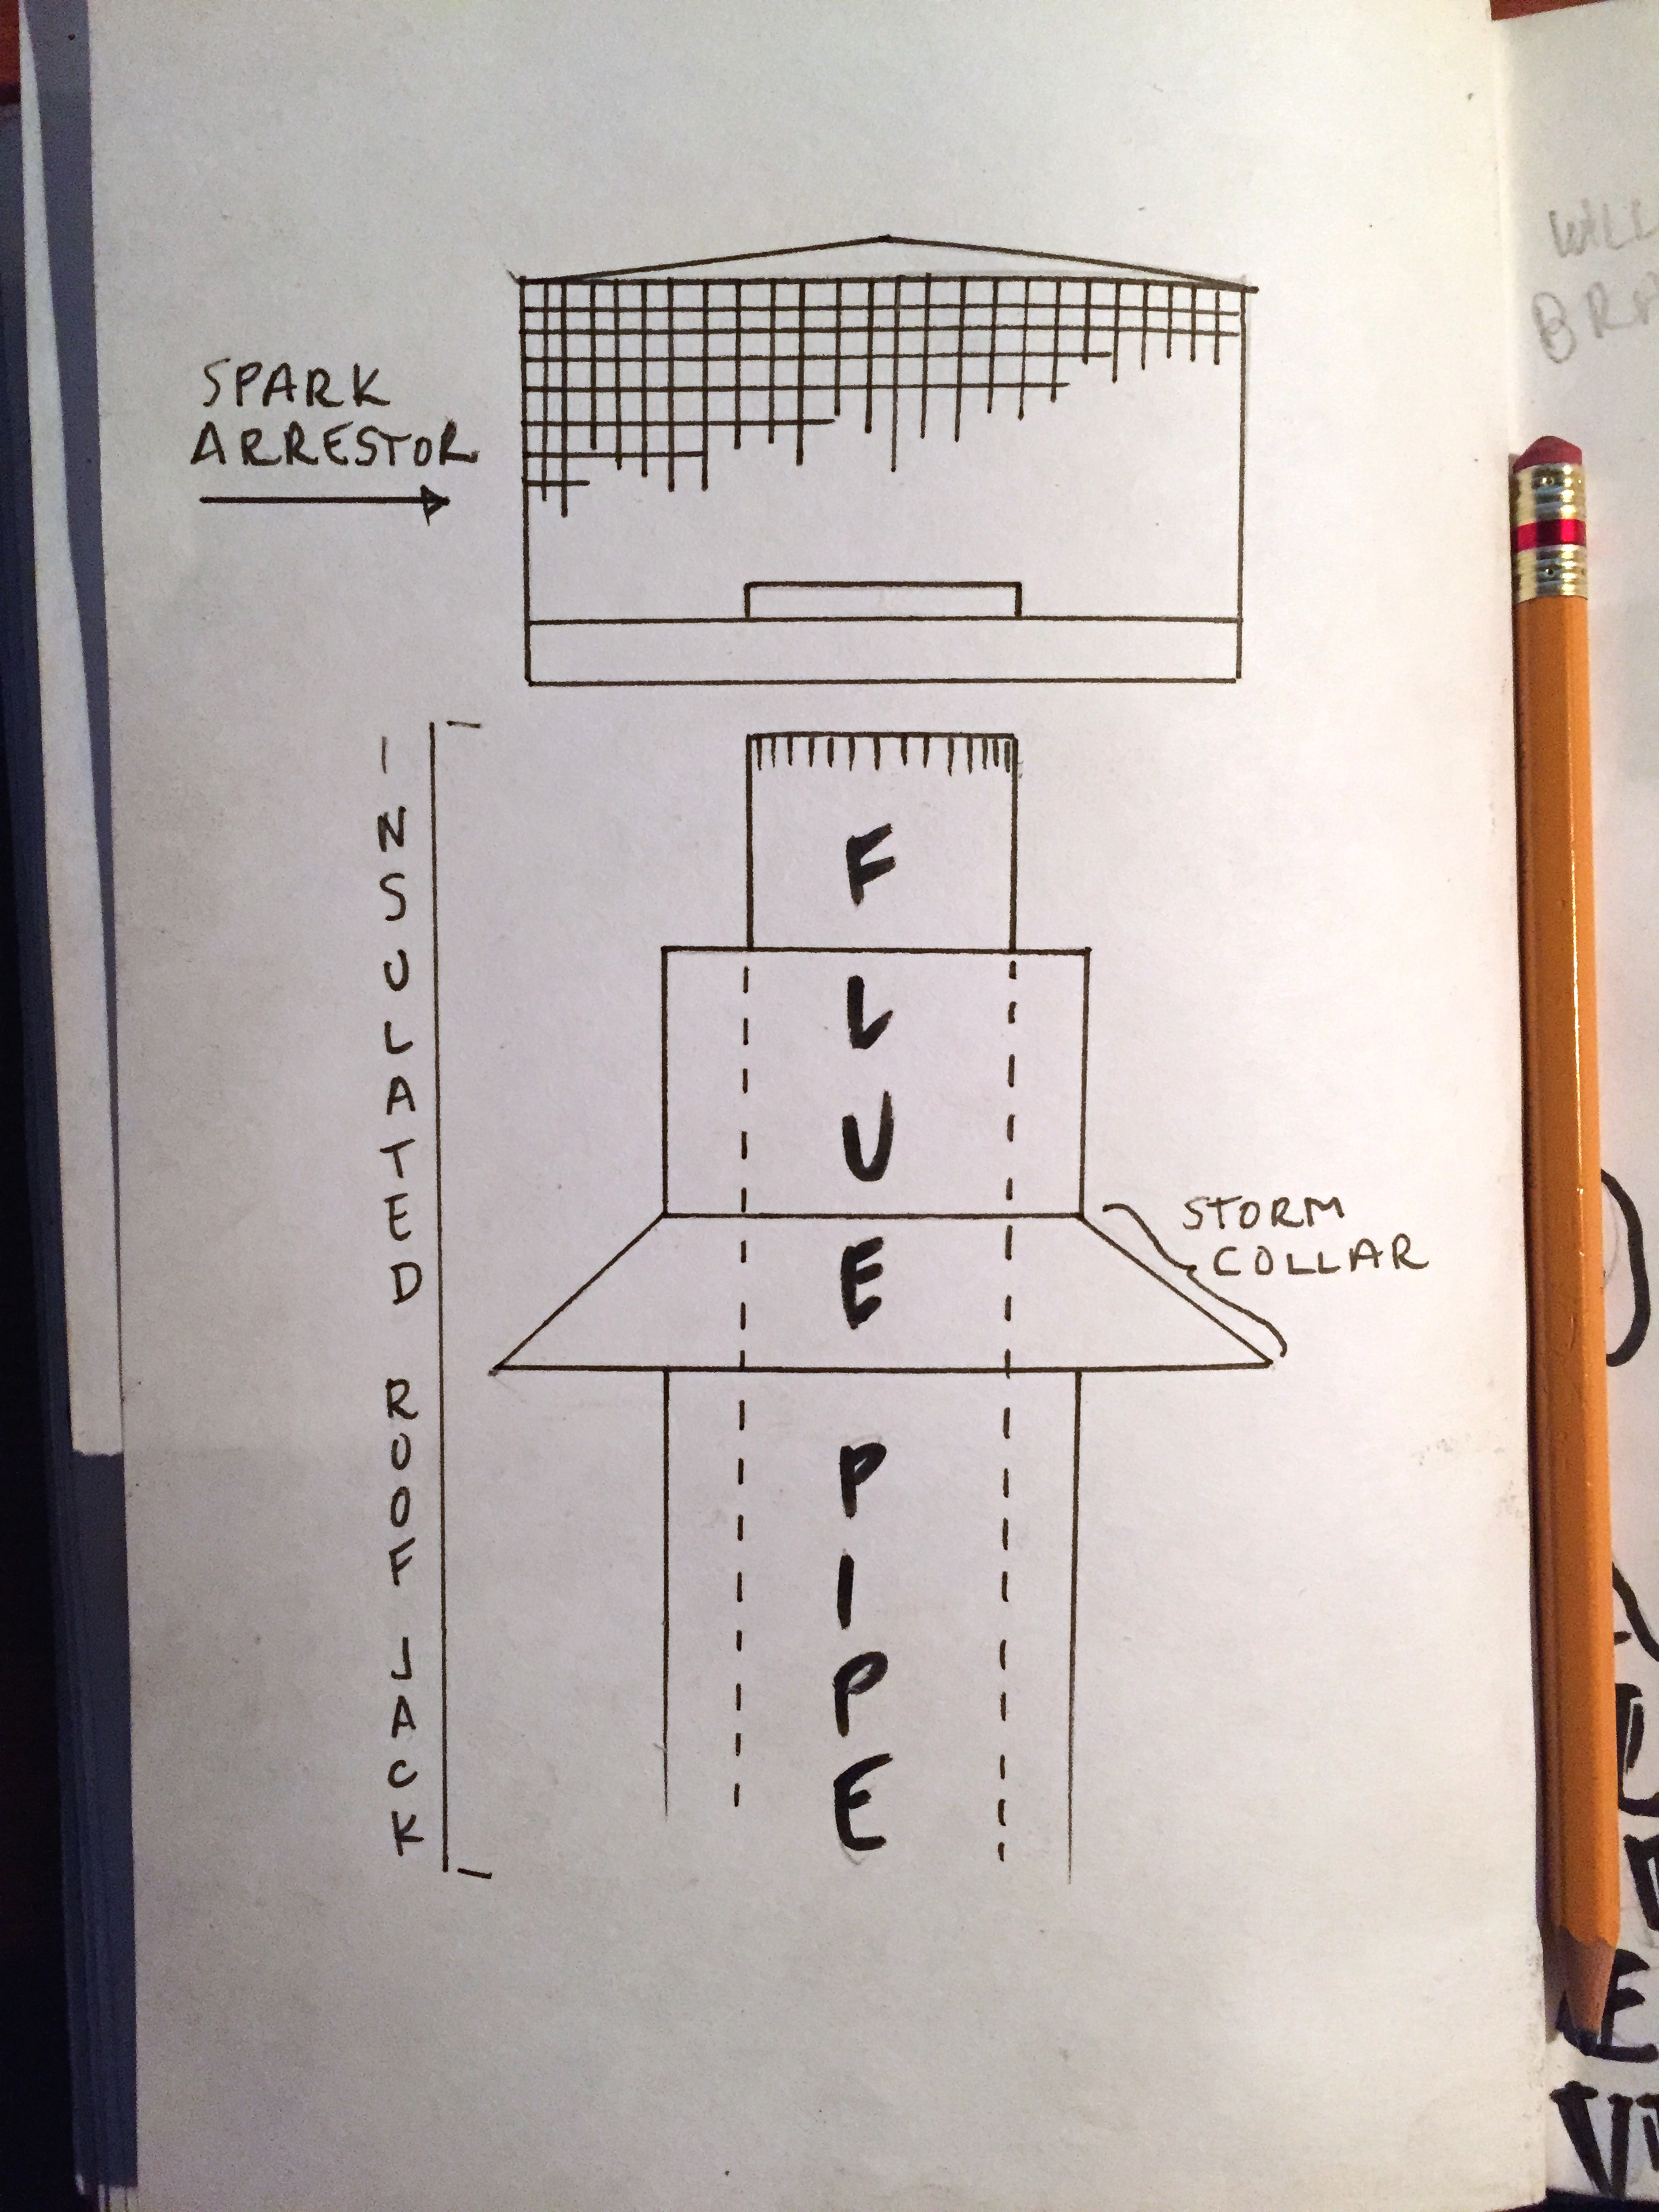
If your flue is straight (illustration 1. below), this’ll be a whole lot easier. Let’s tackle that first.

Clamber up onto the roof and remove the spark arrestor. It may be held on with screws, or it may simply be snug on the top section of flue pipe. Set it aside for cleaning.
Feed the brush into the flue and push down, adding sections of pole-extension if necessary, until you feel the brush pop out into the interior of the stove. Then pull the brush back up and all the way out. Inspect the flue with a strong flashlight, and repeat until no more creosote remains in the flue.
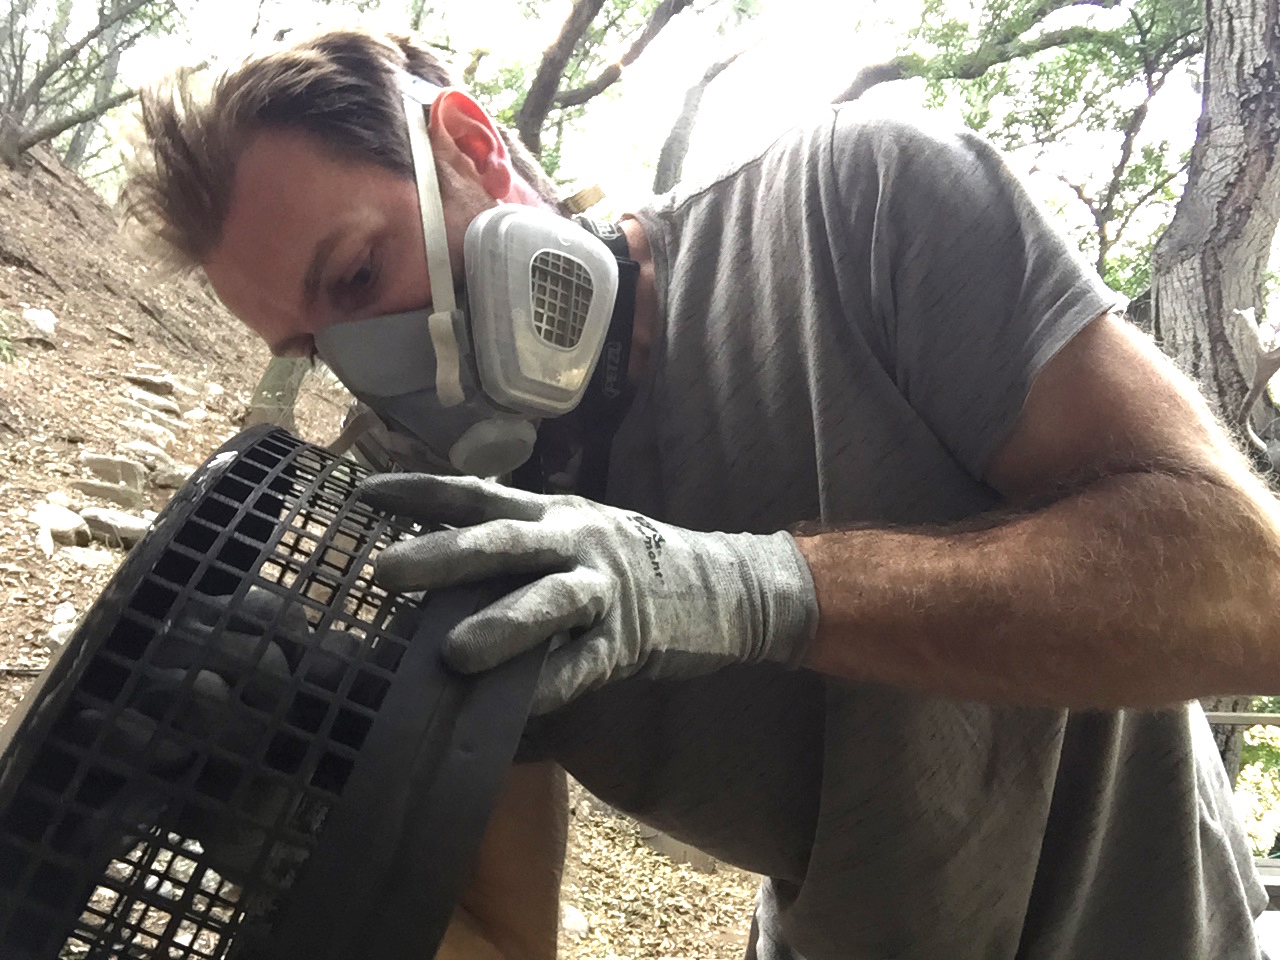
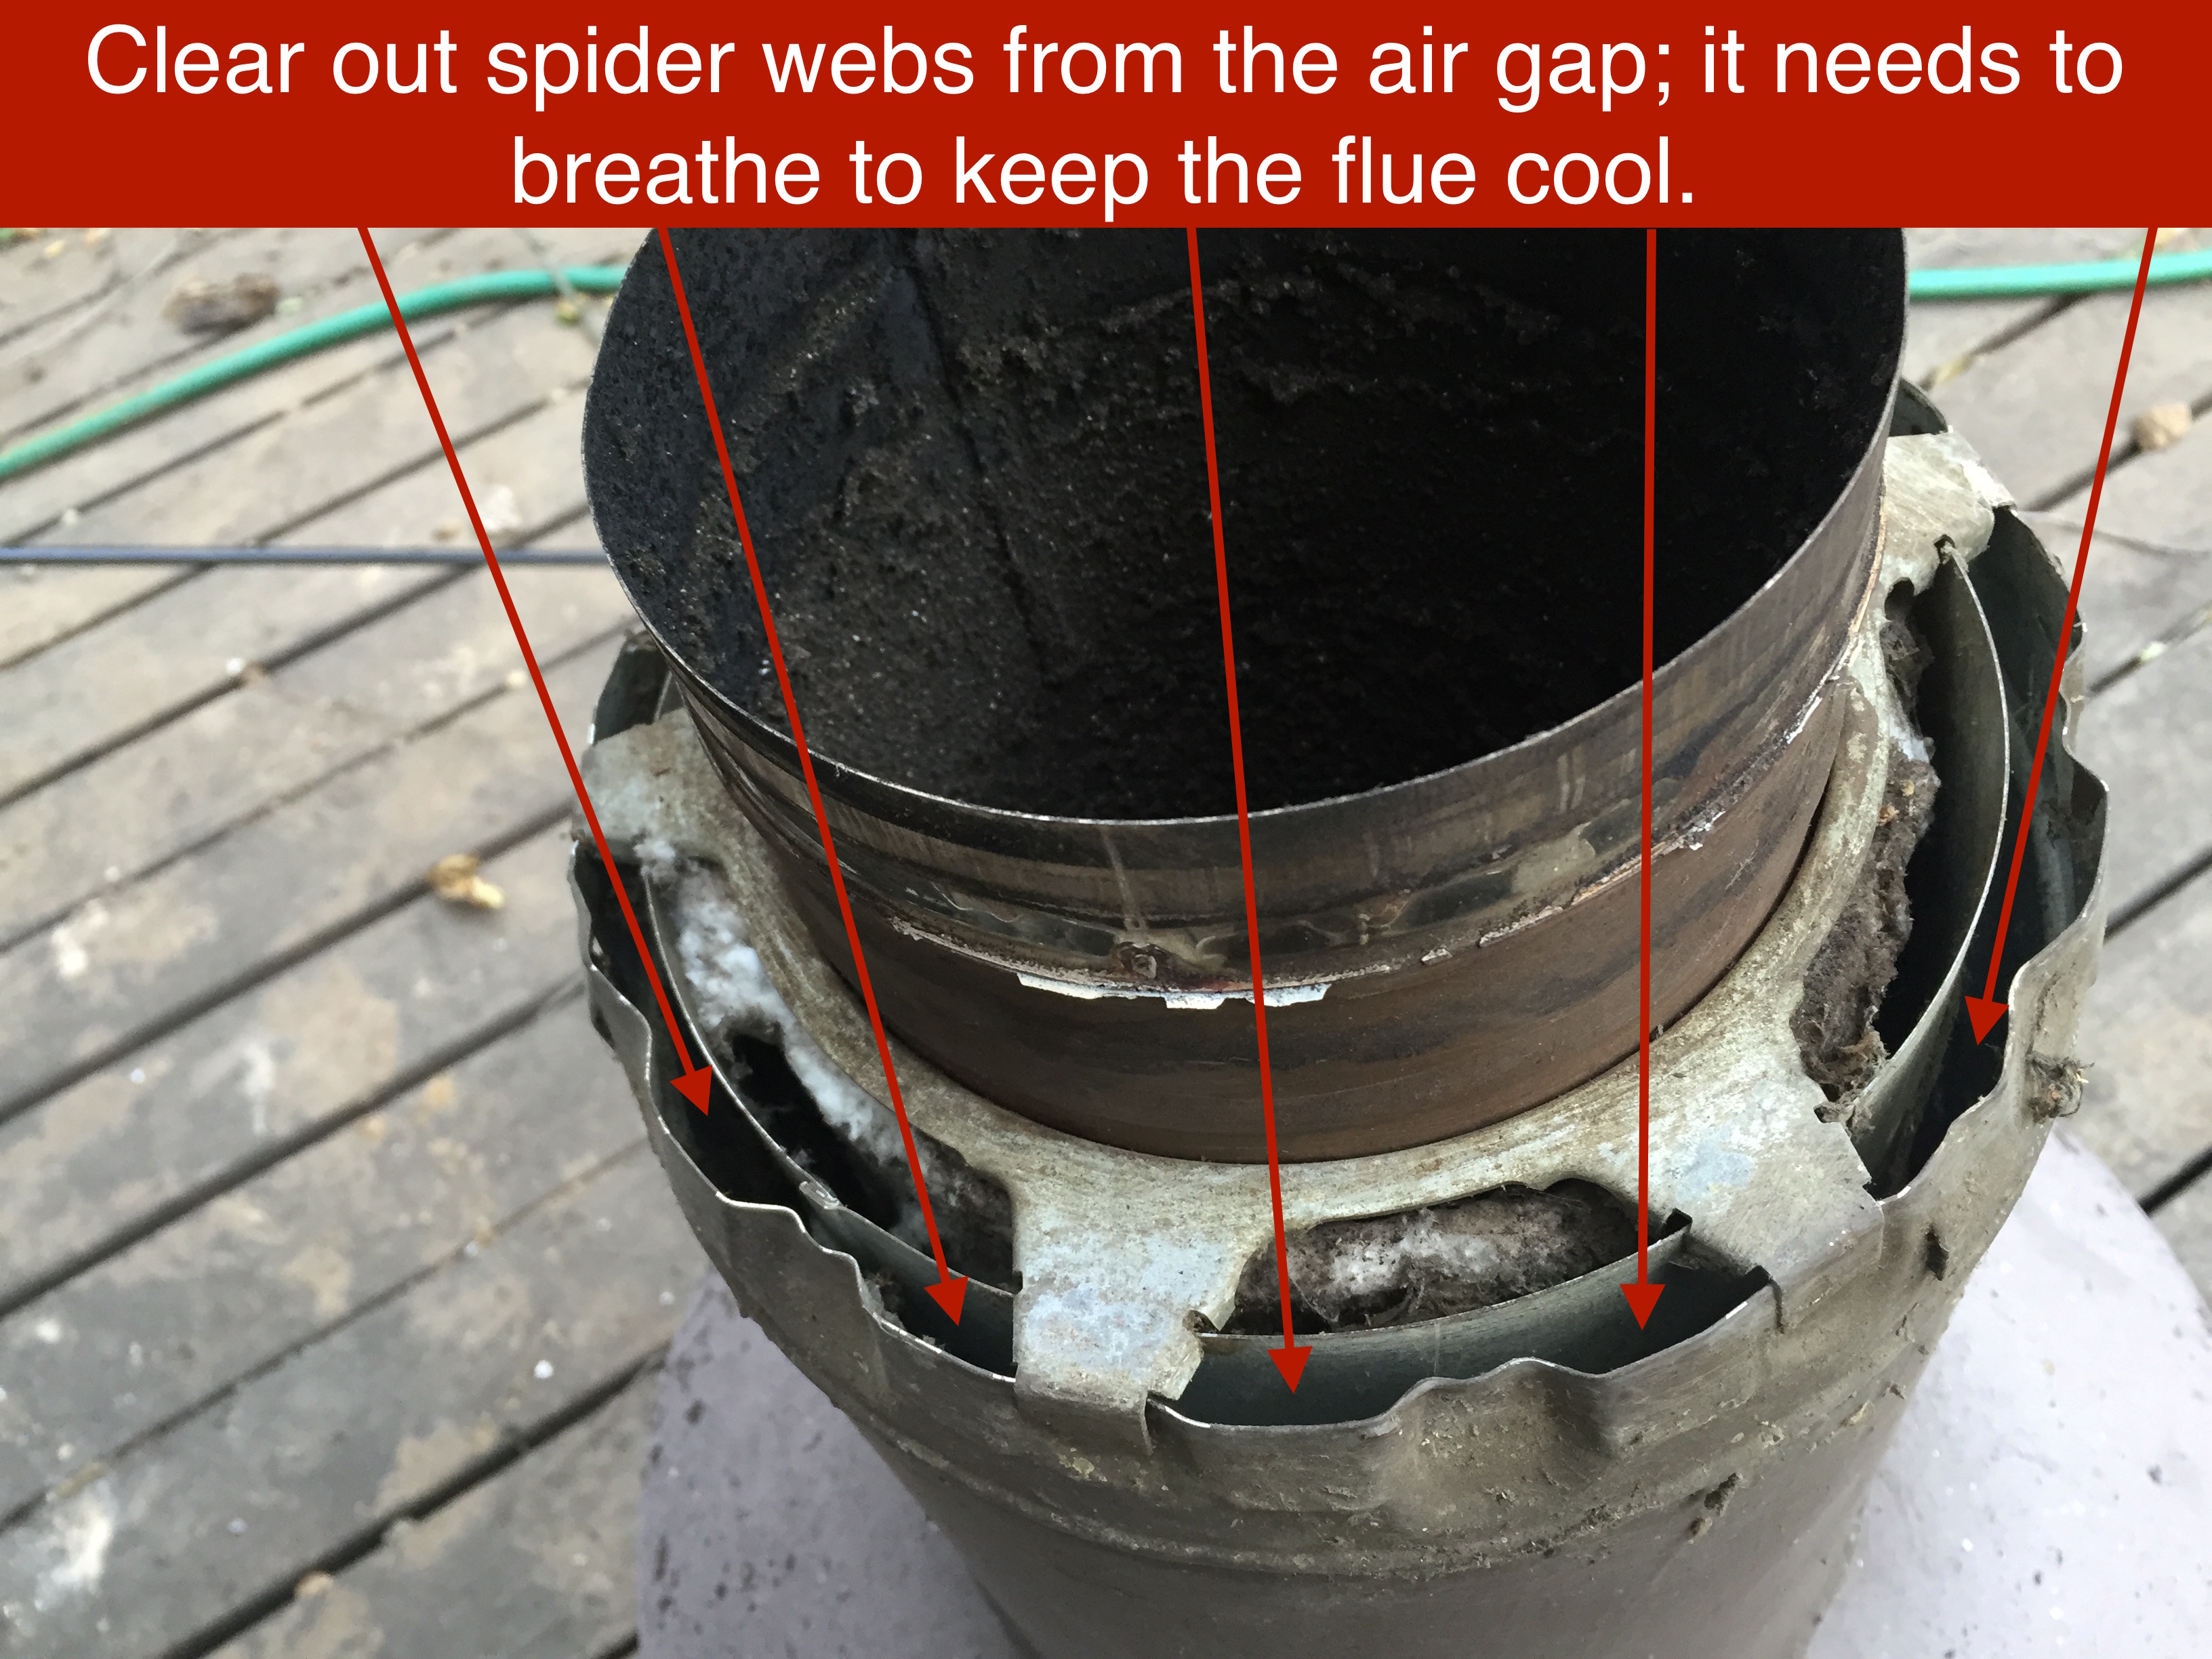
Now turn your attention to the spark arrestor and the roof jack. Clear out leaves, spider webs and brush creosote and ash away with a brass brush. Really reach in there and get all the surfaces.
When everything is cleaned up, you’ll have a pile of creosote dust. Wrap it up in a trash bag and throw it away. Make sure to check inside the wood stove for loosened creosote and remove any you find. Reattach the spark arrestor and you’re done.
 Now. If your flue has one or more bends (illustration 2. above) the chimney brush cannot be pushed through. Don’t try. It will get stuck and/or damage your flue pipe. Clamber up on the roof and remove the spark arrestor. Lift the insulated roof jack off the highest section of flue pipe, and continue disassembling the stack from top down. Line the pieces up in order as removed to make reassembly stress-free. Brush out the pieces as instructed and then begin reassembly in reverse with the first section of flue pipe on the stove.
Clean flue pipe ready for reassembly.
![]()
